ATZ CRM helps staffing and recruitment teams generate invoices from placement records. This keeps billing connected to the candidate, job, client, and hiring workflow.
Quick Answer
Move the candidate to Hired, open Placements & Billing, click Start Billing, enter the billing details, and submit the form to generate the invoice. Admins can adjust invoice branding and static invoice content from Admin Settings > Customized Invoice.
When an Invoice Appears
An invoice appears in Placements & Billing after two things happen:
- The candidate is moved to the Hired stage.
- Billing is started for that placement.
If the candidate has not reached the right stage yet, review: Change job status and candidate stages.
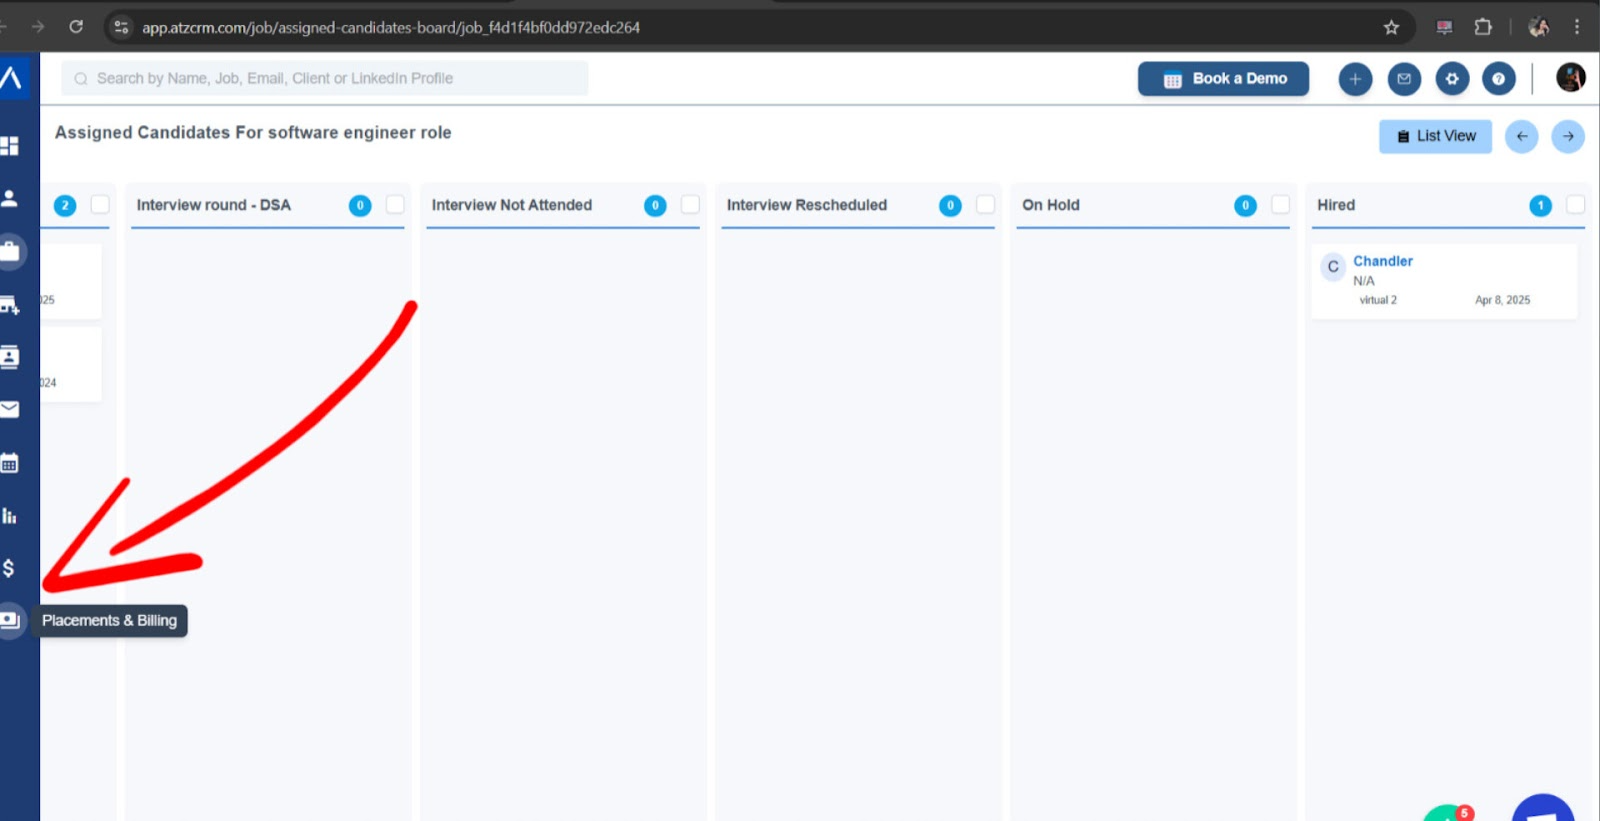
Step 1: Move the Candidate to Hired
Open the job where the candidate is listed, select the candidate, and move the candidate to the Hired stage.


The candidate is then registered in Placements & Billing.
Step 2: Open Placements & Billing
Go to Placements & Billing and find the placement by candidate name, job title, or client name.
Step 3: Start Billing
Click Start Billing next to the candidate placement.

Fill in the billing details:
- Billing amount
- Deposit
- Tax
- Joining date
- Invoice due date
- Description, if required
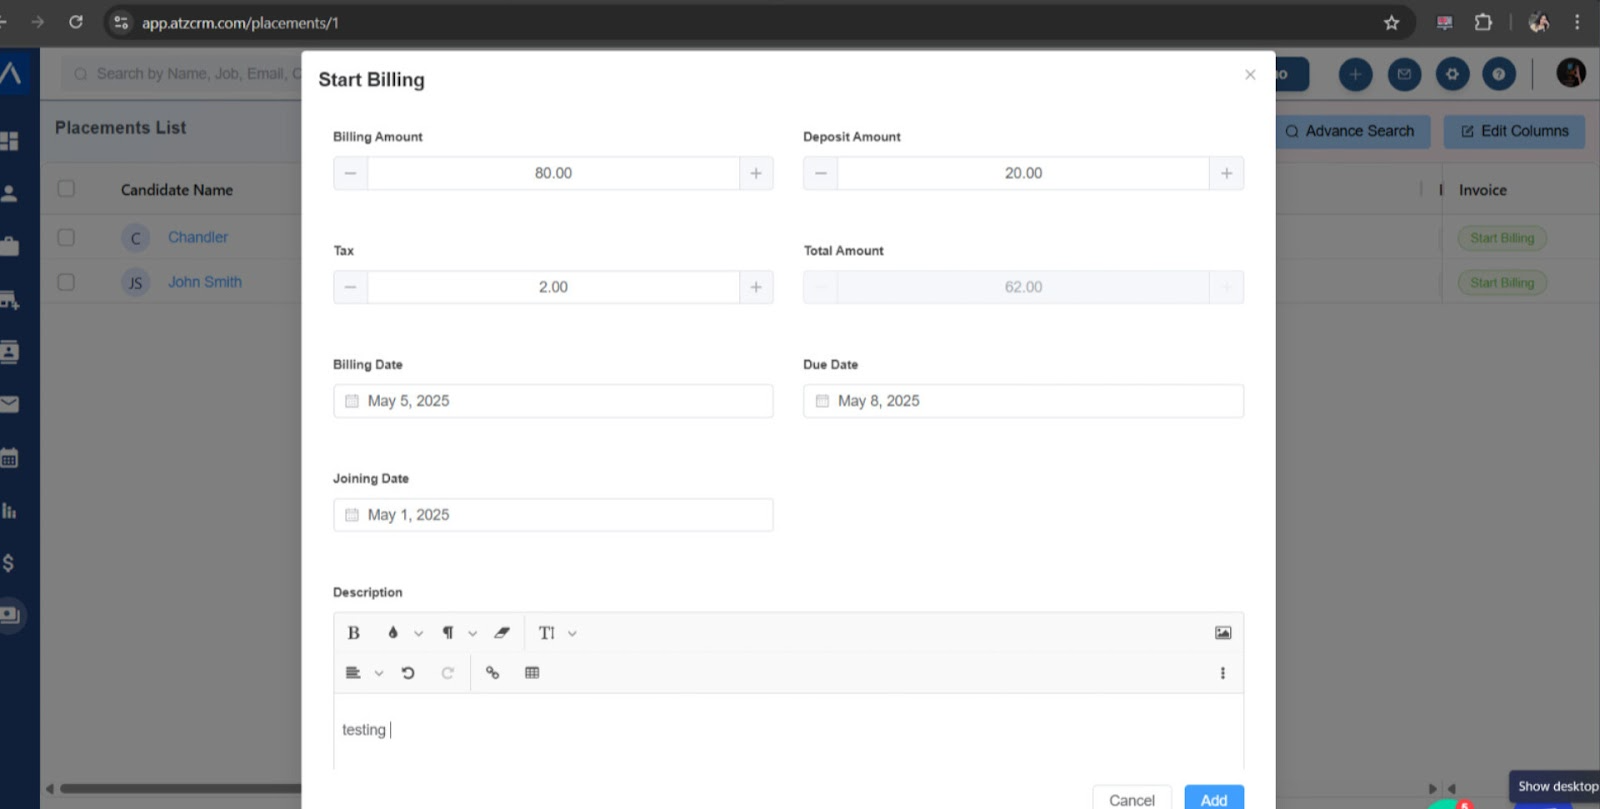
Submit the form to generate the invoice. The description added here appears on the invoice and applies to this billing record.
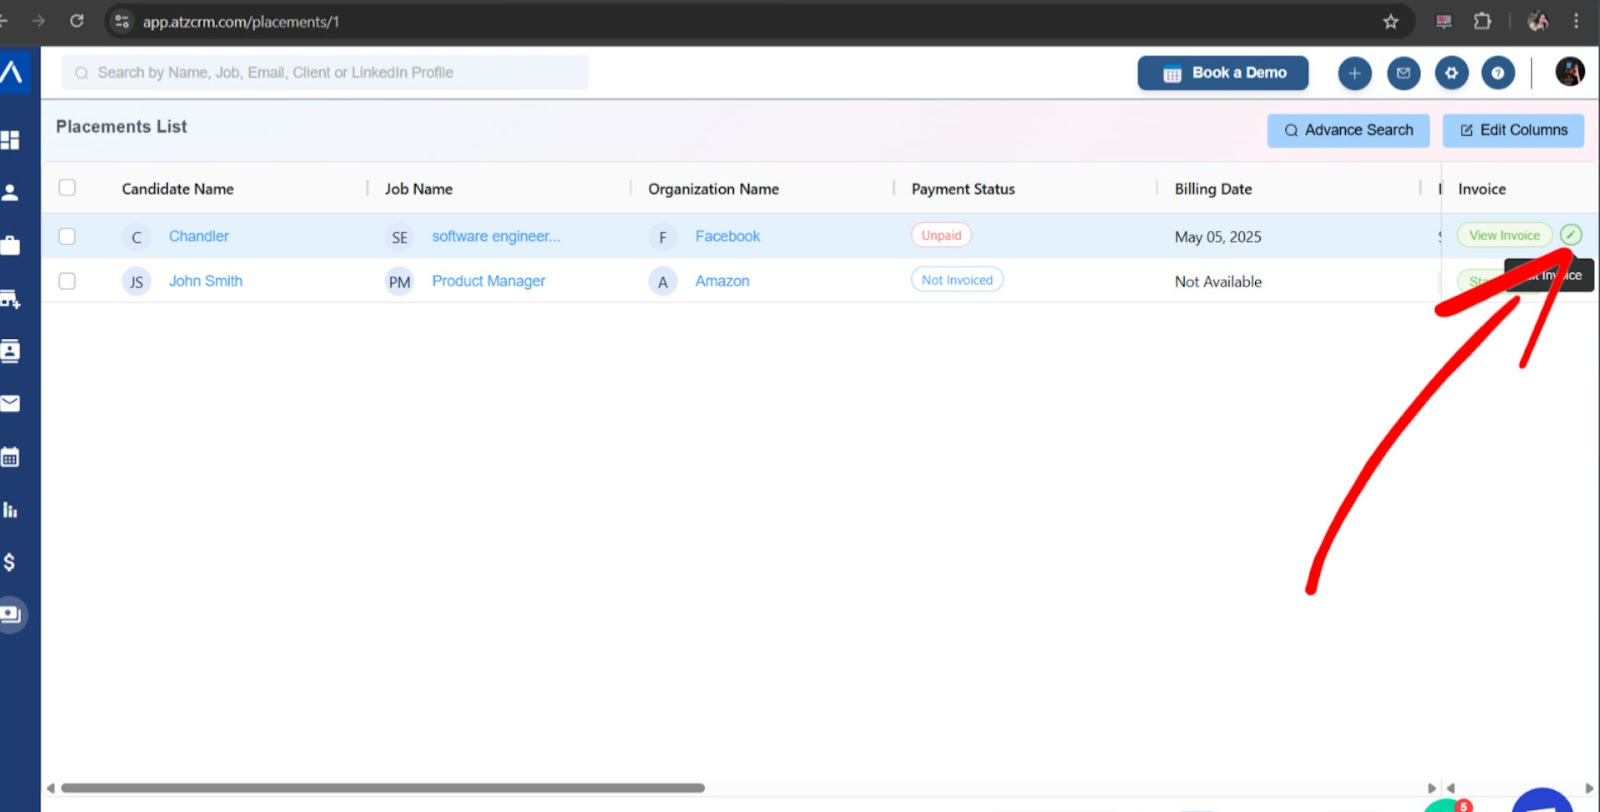
View and Edit an Invoice
After the invoice is created, use View Invoice to preview it.

Most invoice fields, including billing amount, tax, due date, and billing details, can be edited later.
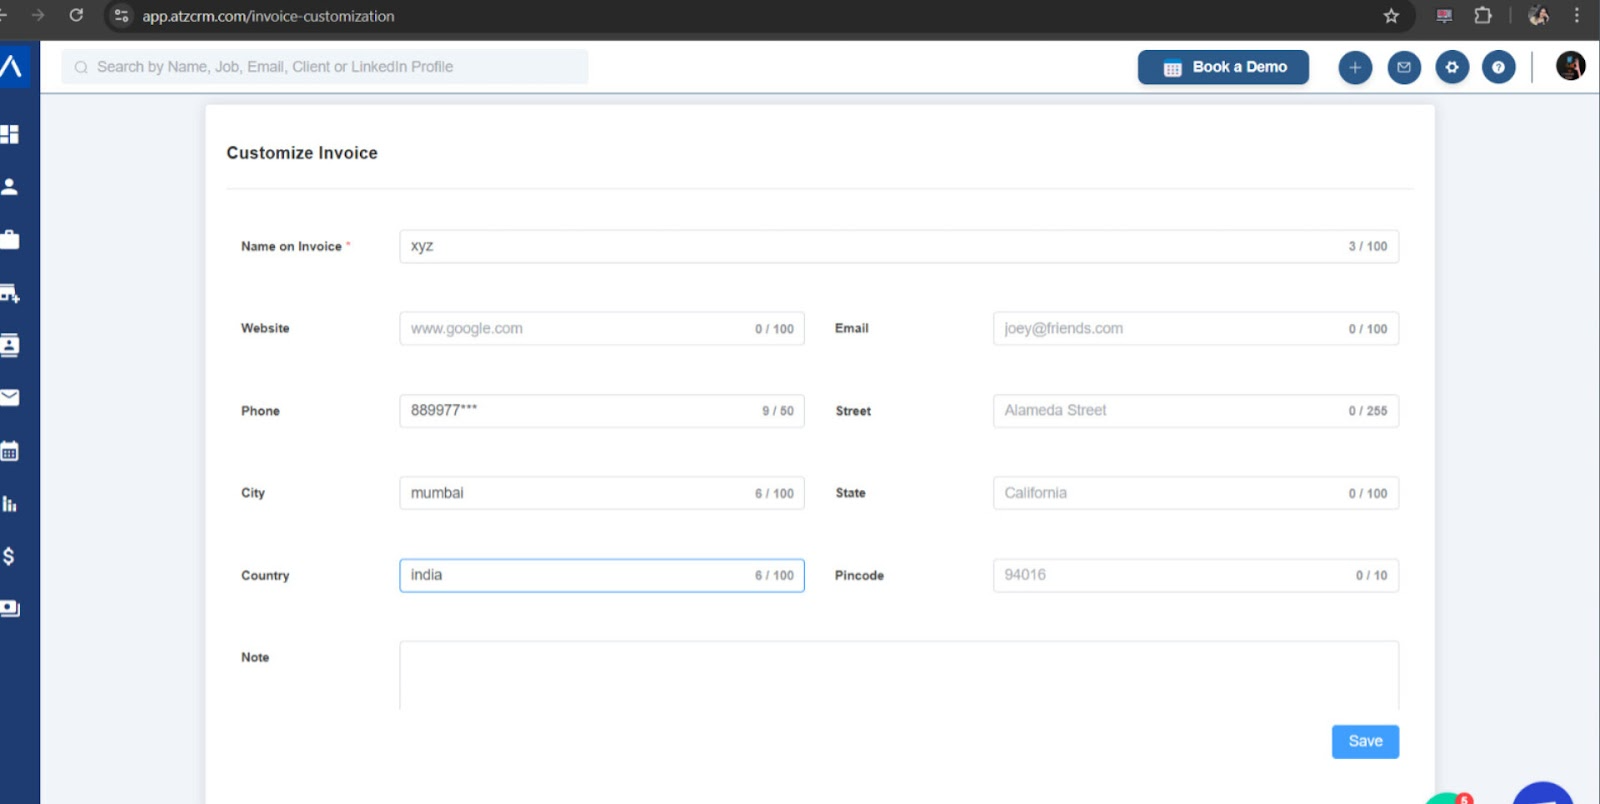
Customize Invoice Format
Admins can customize the layout and static invoice content from Admin Settings > Customized Invoice.
You can update:
- Invoice title
- Terms
- Notes
- Company logo
Use Cases
Permanent Placement Billing
Generate an invoice when a candidate is successfully hired and the recruitment fee is due.
Staffing or Contract Billing
Use invoice details alongside contracts, shifts, and timesheets when your team bills based on work completed.
Branded Client Invoices
Customize invoice branding so invoices include your company logo, preferred title, terms, and notes.
Troubleshooting
The Candidate Is Not Showing in Placements & Billing
Confirm the candidate has been moved to the Hired stage for the correct job. If the candidate is still in an earlier pipeline stage, billing will not be available.
The Invoice Details Look Incorrect
Open the invoice or billing record and edit the available fields. Also confirm the candidate, job, client, and amount were selected correctly before sending the invoice externally.
I Cannot Customize the Invoice Template
Invoice customization is controlled from admin settings. Ask an admin to update invoice title, terms, notes, or logo.
FAQs
Can I create an invoice without hiring a candidate first?
No. The invoice workflow is tied to placements, so the candidate must be moved to Hired before billing can start.
Does the billing description appear on the invoice?
Yes. The description entered during billing appears on that invoice and is specific to the billing record.
Can I change the company logo on invoices?
Yes. Admins can upload or update the company logo in Admin Settings > Customized Invoice.