Email sequences automate follow-up emails and internal tasks for candidates or contacts. They continue until the recipient replies, opts out, completes the sequence, or is manually unenrolled.
Quick Answer
Open Admin Settings > Templates > Email Sequences, click Create Sequence, choose the audience, add email or task steps, set timing, and save. Use Manage Email Sequences to enroll candidates or contacts.
Availability and Permissions
Email sequencing is available on the Business plan. Free and Pro plan users can create 1 sequence.
Sequence creation is limited to account owners, admins, and users with custom roles that include sequence access.
What You Can Do With Sequences
- Send scheduled email templates to candidates or contacts.
- Combine email steps and task steps in one automated workflow.
- Automatically stop the sequence when a recipient replies.
- Include unsubscribe links for compliant outreach.
- Reorder steps with drag and drop.
Step 1: Open Email Sequences
Go to Admin Settings > Templates > Email Sequences.
Step 2: Create a Sequence
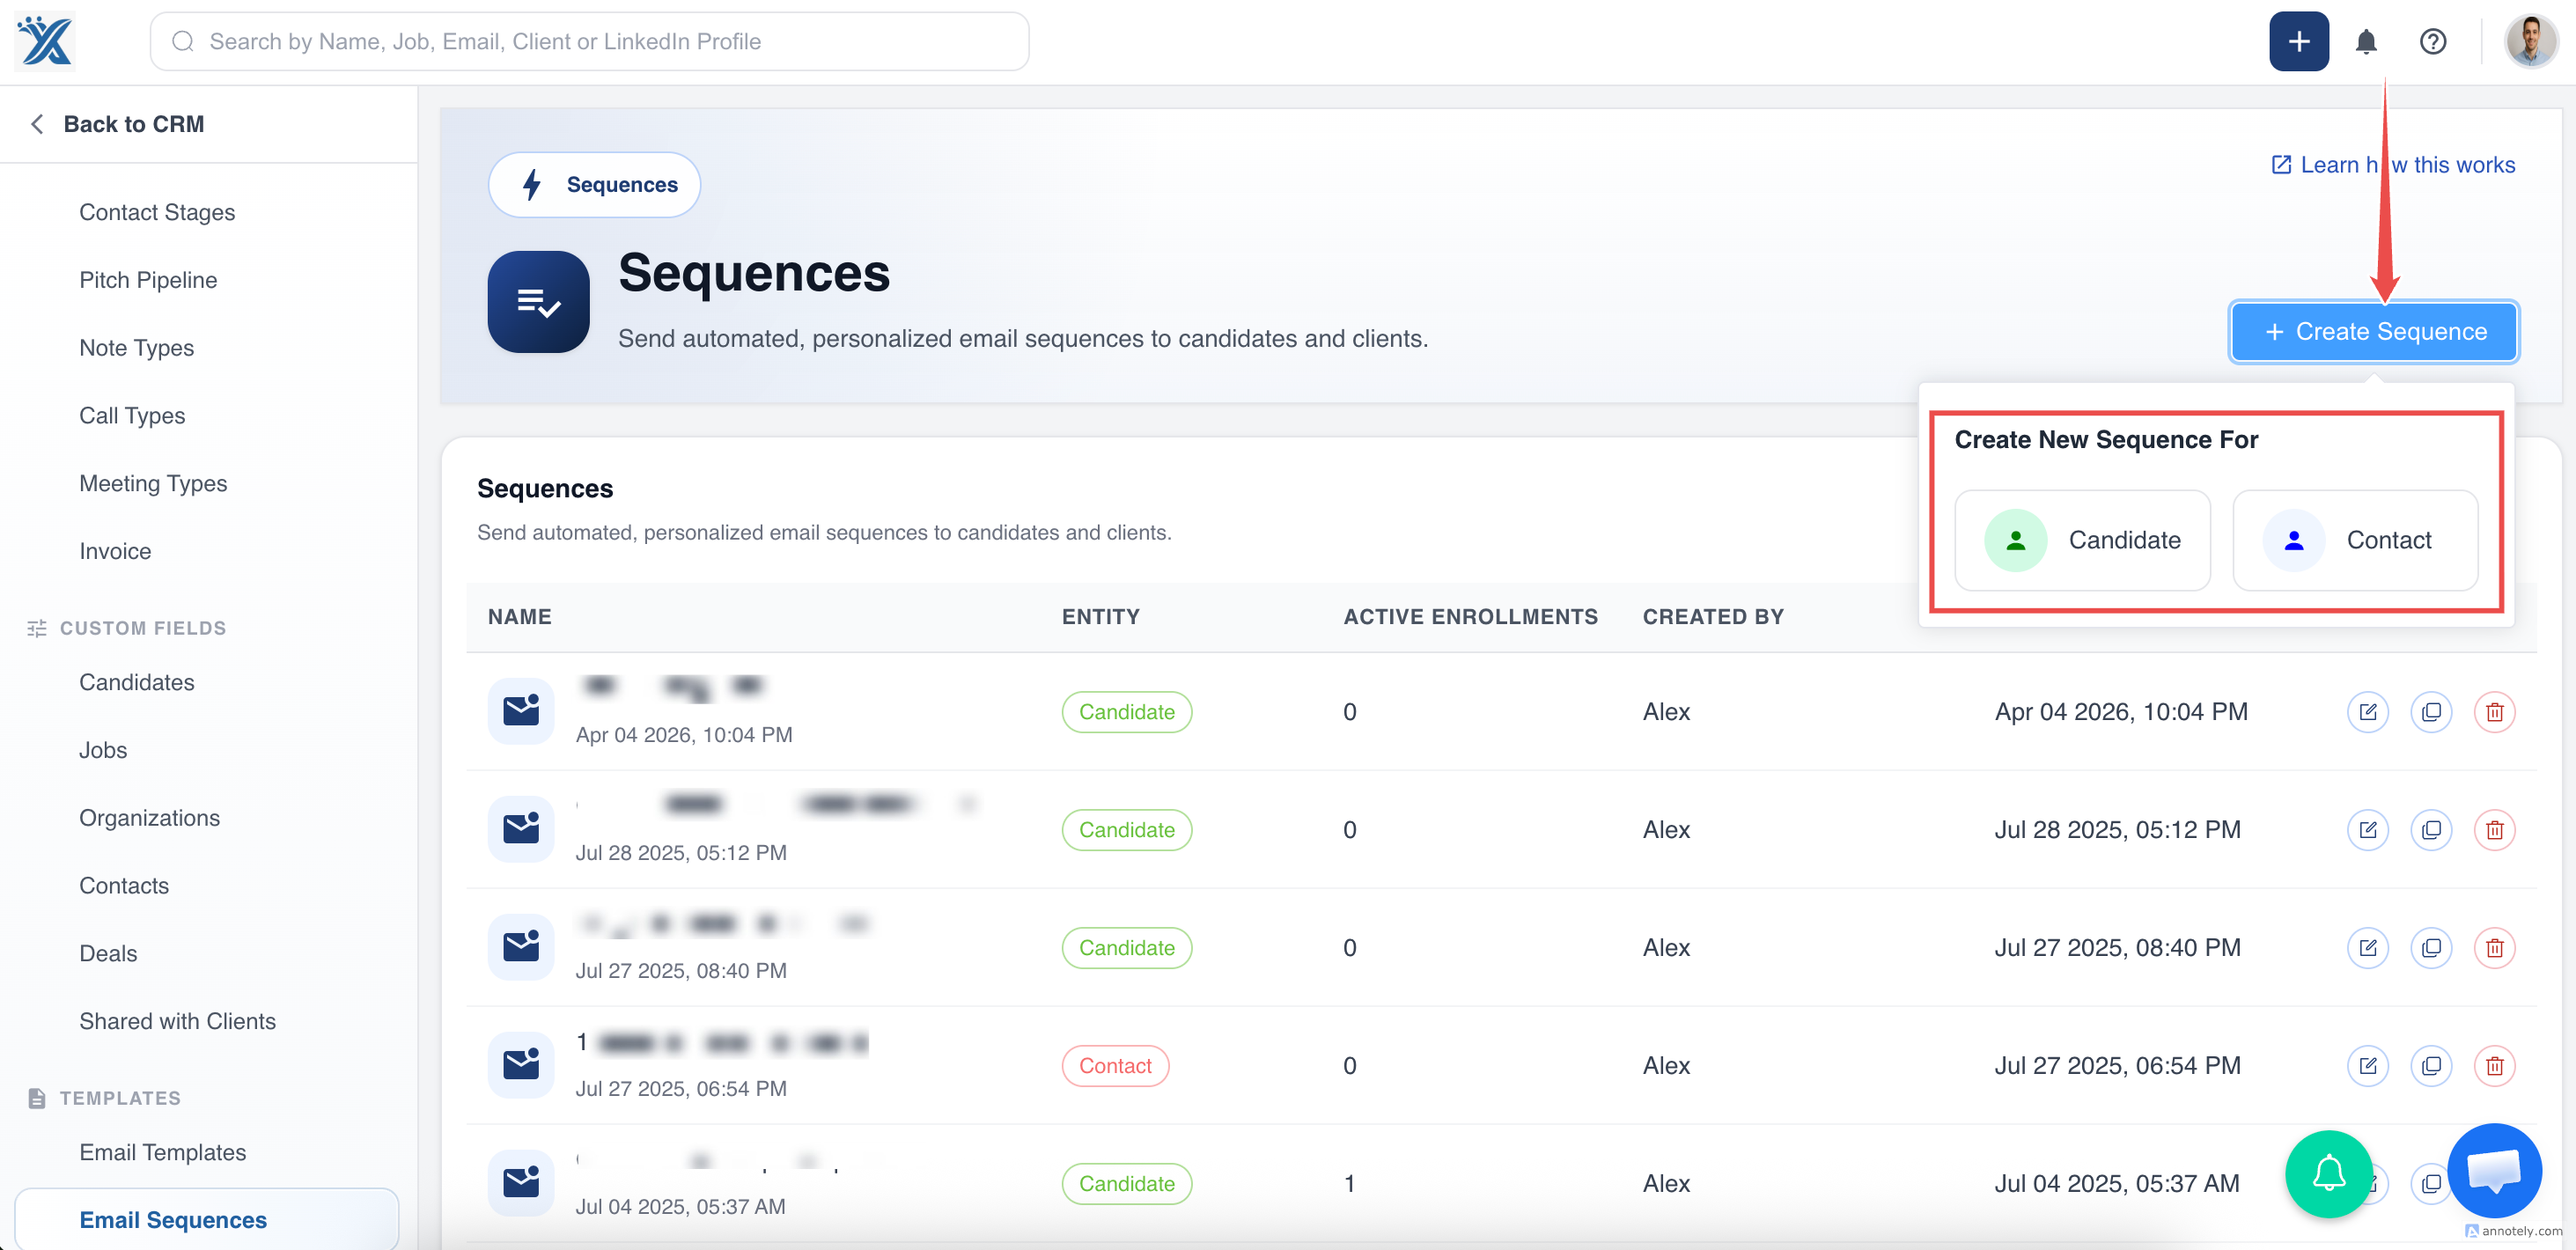
Click Create Sequence, then choose whether the sequence targets Candidates or Contacts.
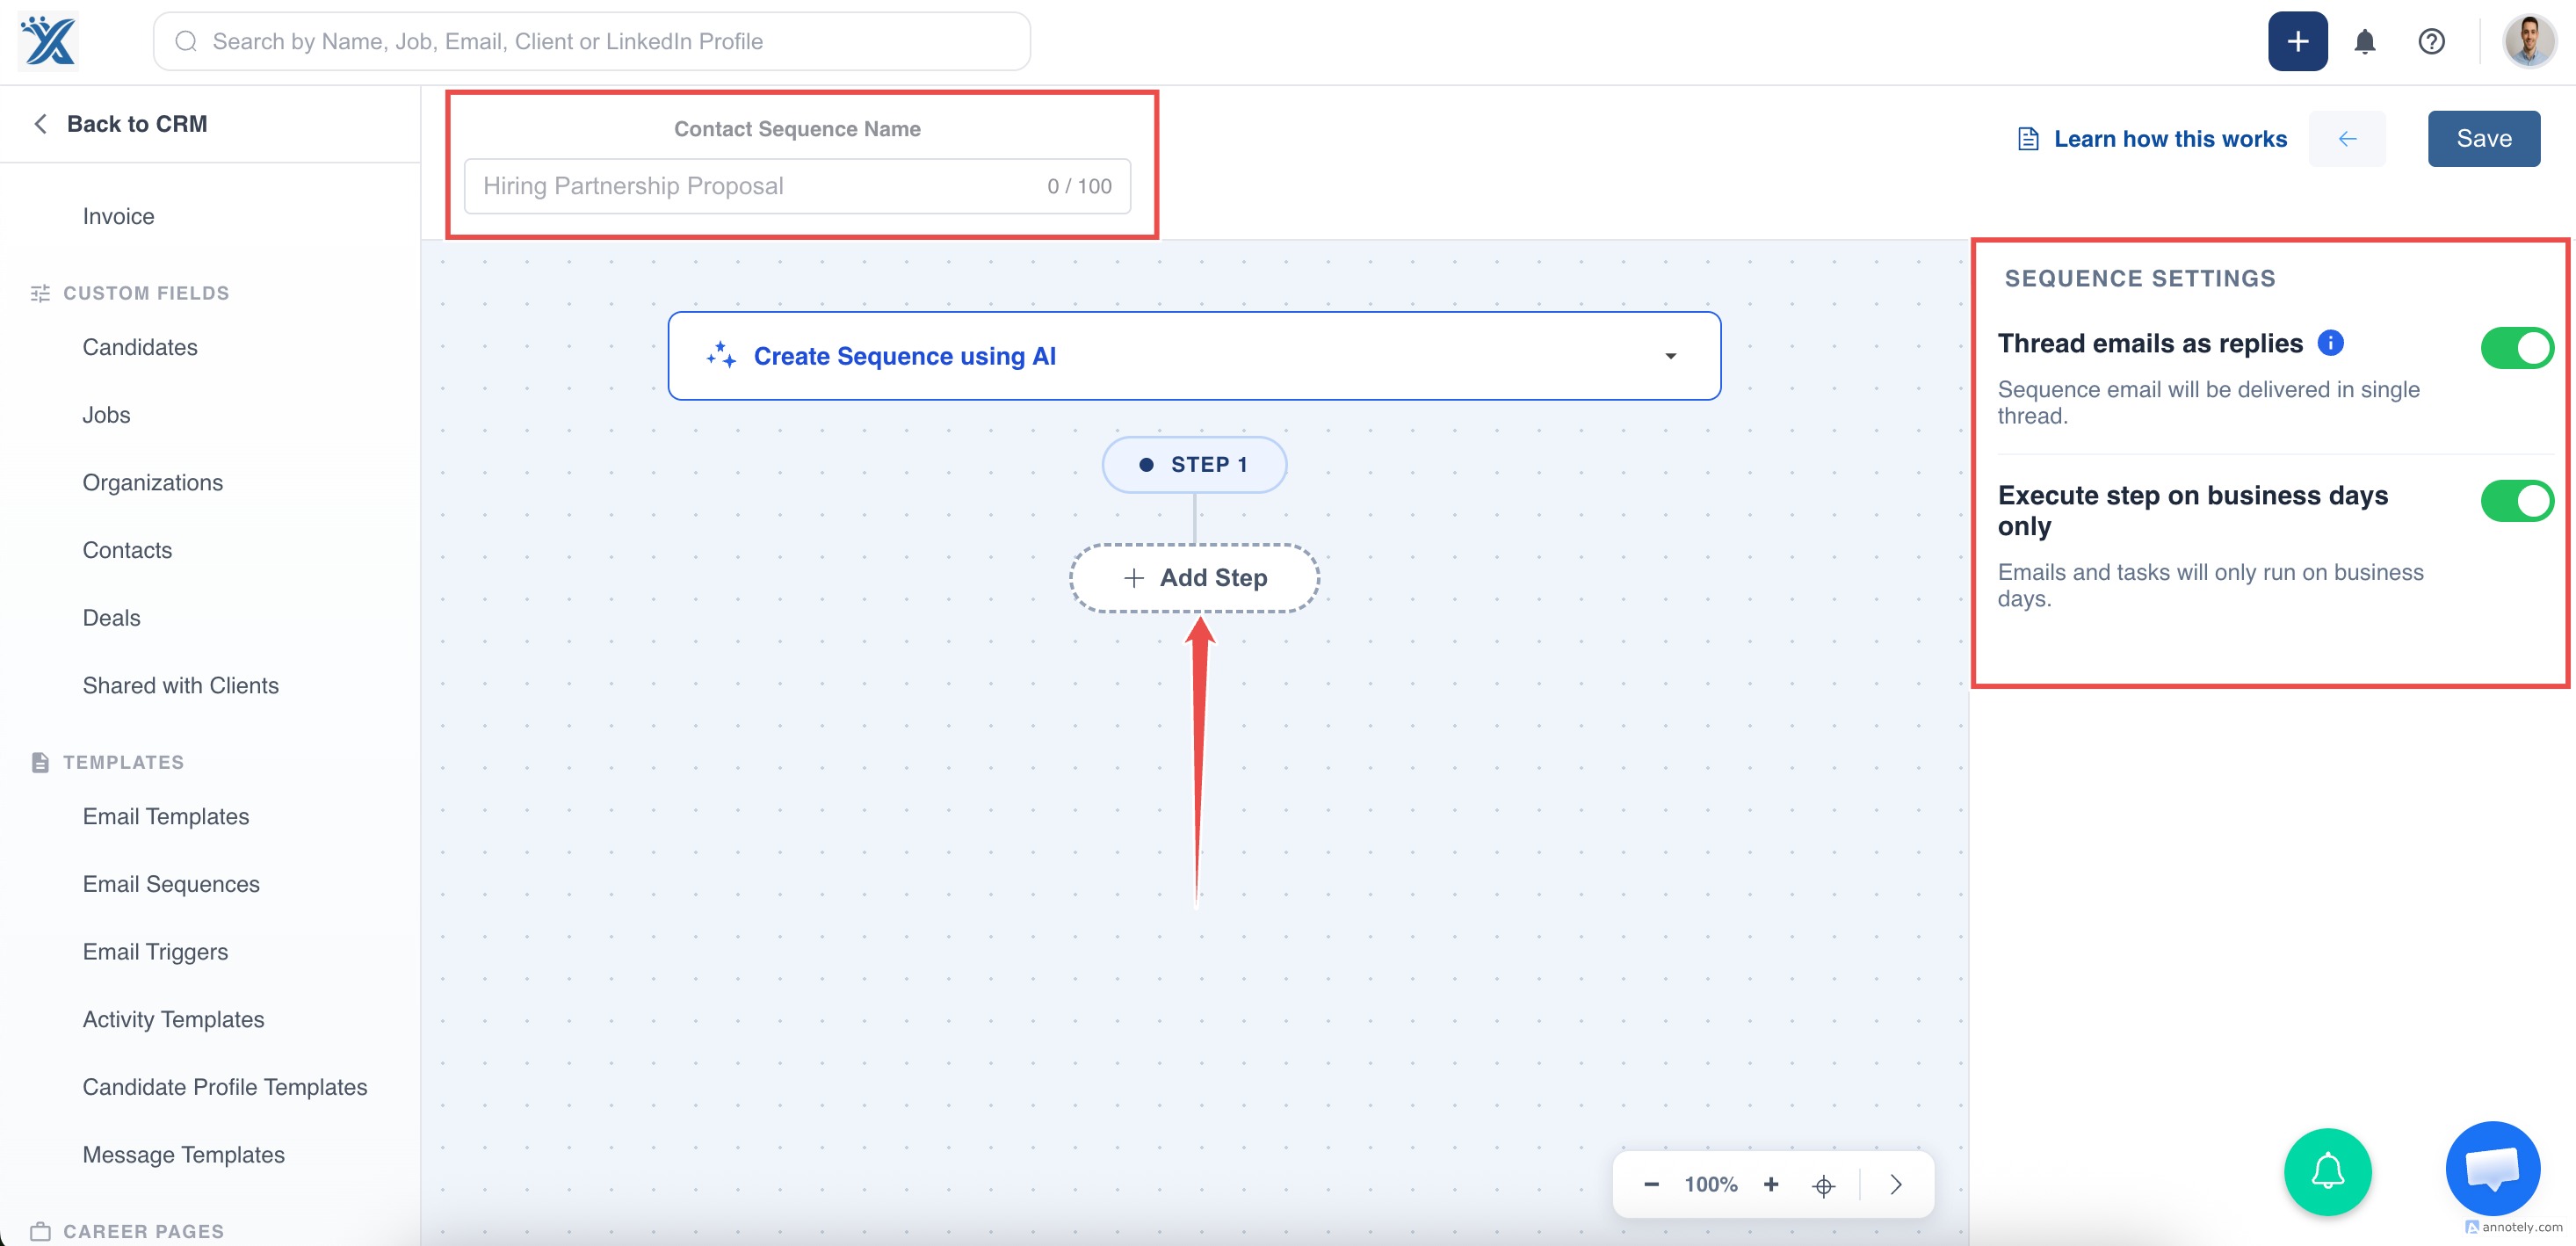
Step 3: Name the Sequence and Add a Step
Add a sequence name, then choose whether the first step is a task or an email. For email steps, select an existing template or create a new one.

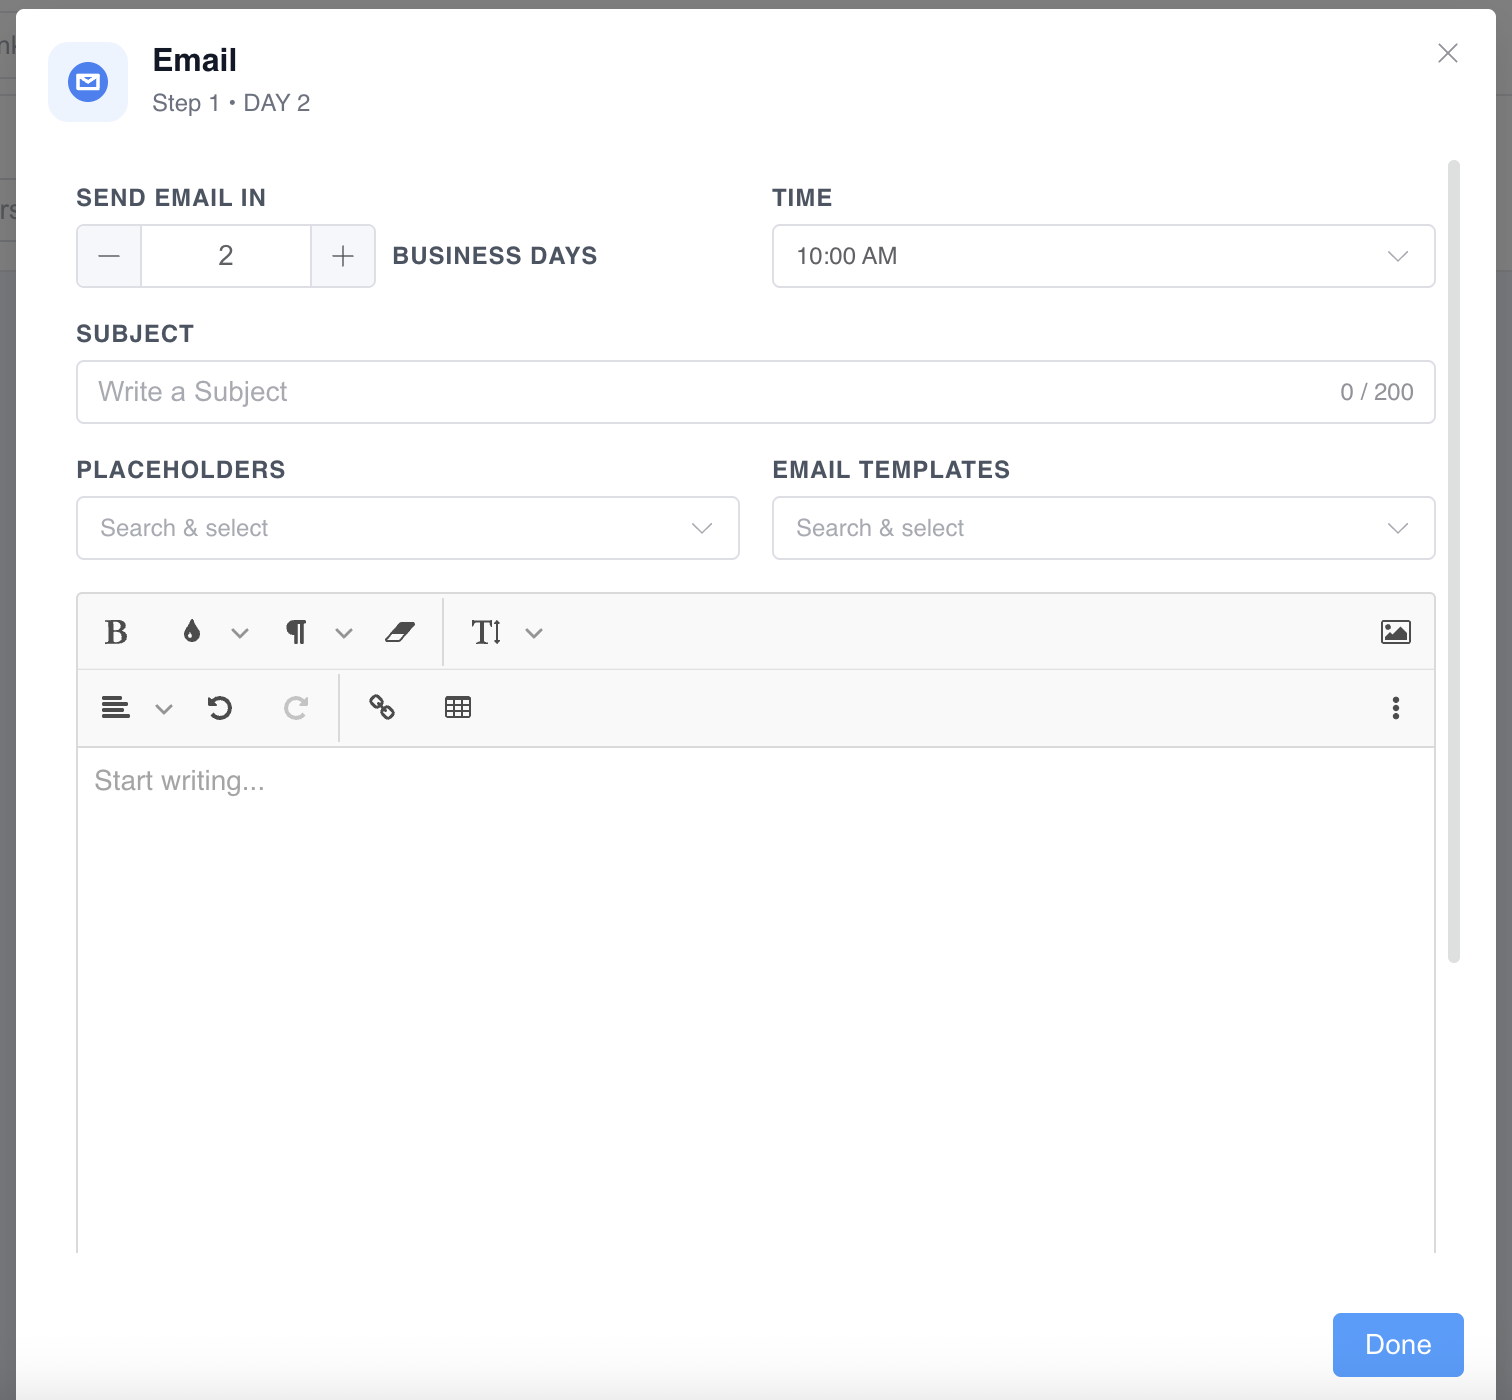
Step 4: Schedule the Step
Set how many days after sequence start the step should run.
For example, if the start date is January 1 and Send Email In is set to 2 days, the email sends on January 3.
Set the value to 0 when the first email or task should run on the same day the sequence starts.
Step 5: Restrict to Business Days
Turn on the business-day option if emails and tasks should run only on weekdays.
Step 6: Add an Unsubscribe Link
For email steps, include an opt-out or unsubscribe link when required by your outreach policy.
Learn more: Enable unsubscribe and opt-out links.
Step 7: Build the Full Sequence
You can add up to 20 steps:
- Maximum 10 email steps.
- Maximum 10 task steps.
- Steps can be scheduled from Day 0 to Day 250.
Avoid overlapping timing so the sequence remains easy to review and manage.
Email Signature in Sequences
Sequence emails use the same email signature configured in your regular email settings. To update it, see: Customize email signature.
Limits and Sending Rules
Send Time Slots
Sequence emails are sent in 30-minute intervals, such as 9:00 AM or 9:30 AM. Timing follows the timezone of the user who enrolled the contact or candidate.
Enrollment Limits
Each user can enroll up to 500 prospects at a time. A single user can also have up to 500 active or paused enrollments across all sequences.
Account Sequence Limits
Business plan accounts can create up to 1000 sequences. Pro plan accounts are limited to 1 active sequence for testing.
Send Delay
ATZ CRM includes a 3 to 5 second delay between sequence emails to reduce throttling risk.
Use Cases
Candidate Outreach
Automate structured follow-ups for sourced candidates.
Client Follow-Up
Send scheduled touchpoints to client contacts after an introduction or meeting.
Recruiting Task Cadence
Mix email steps with task reminders so recruiters know when to call, review, or follow up.
Troubleshooting
I Cannot Create More Sequences
Check your plan and account sequence limits. Free and Pro plans can create only one sequence.
A Recipient Was Unenrolled
Recipients are unenrolled when they reply, opt out, complete the sequence, or are manually removed.
Email Timing Looks Wrong
Check the enrolling user’s timezone in profile settings.
FAQs
Can I edit a running sequence?
Yes, but edits apply only to new enrollments made after the change is saved. Existing enrollments are not affected.
Can the first step run immediately?
Yes. Set the step timing to Day 0.
Can I add images to my sequence signature?
Yes. Add an image in email signature settings and resize it by dragging the bottom-right corner of the image.